3 Different Ways to Do Outline Shading in Unity URP
Final Results:

Layer Based Backface Culling Outline, Outline Normal Calculator for shape edged objects
Backface Culling Outline without Stencil

Per-Object Backface Culling Outline with Glow

Clip-Spaced Backface Culling

Fresnel Outline with Glow

Depth Sobel Outline

Depth Normal Sobel Outline
References:
High-Level Theory:
Real-Time Rendering, 4th edition
Making Concept Art Real for Borderlands
Direct Reference:
Ned Makes Games, https://www.youtube.com/watch?v=1QPA3s0S3Oo&list=PLAUha41PUKAaYVYT7QwxOtiUllckLZrir&index=1
Other References:
Pixel-Perfect Outline Shaders for Unity, https://www.videopoetics.com/tutorials/pixel-perfect-outline-shaders-unity/
Unity Open Project, https://forum.unity.com/threads/outline-effect.980034/
Animated Dotted Outline Shader in Unity, https://lindenreid.wordpress.com/2017/12/24/animated-dotted-outline-shader-in-unity/
Outline Shader, https://alexanderameye.github.io/outlineshader
Introduction:
Outline shading is an important effect for stylized rendering. This technique can be more complicated than it first appears. There are many tutorials for it out there but I wasn’t able to find one that covers it comprehensively.
The best resource I found is the outline chapter of Real-Time Rendering, 4th edition. The book summarized the outlining techniques into four categories:
Outline with Normal View Angle
Outline with Procedural Geometry
Edge Detection by Image Processing
Geometric Contour Edge Detection
This post is going to go through how I implemented the first three, the problems encountered, and how I solved them. You can download the project here: https://github.com/ThomasChen1220/URP_OutlineTutorial
The Youtube series from Ned Makes Games gave me tons of help. You can reference it for a step-by-step video guide and some fundamental concepts.
This post is only going to cover tricks to overcome some of the roadblocks along the way.

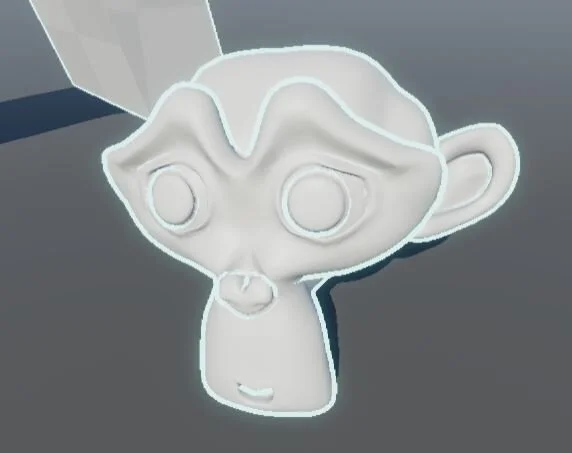
Outline with Normal View Angle:
This technique works by calculating the dot product of view direction and surface normal in the fragment shader. Color the surface with a solid unlit color when it’s over a certain threshold. I used smooth steps for threshold in my project for anti-aliasing.
The technique is the simplest to understand but doesn’t give good results for meshes other than the very simple rounded ones like a sphere.
Backface Culling Outline:
How it works
This technique works by having an additional shader pass for outlining. This pass extrudes every vertex by its normal, turns on front-culling to only render the back face, then renders it with an unlit fragment shader. The original object would block all the back faces pass beside the part that is extruded along normals that are kind of perpendicular to the view.
Hiding the inner lines
You can also add an additional stencil buffer to hide all the inner lines, which can have undesired effects for thick outlines and complicated meshes.

Backface culling with stencil off

Backface culling with stencil on
Layer-based outlines

In Unity URP, a simple way to add the pass for outlining is by using the Custom Render Features. You can choose to render a layer of objects with the additional pass for outlining. I used yet another pass before outlining to render to the stencil buffer.
Using this method, you can specify a layer mask of objects to be rendered with the outline and control the color/thickness and other settings of the outlines all at once.
Per-object outline

However, we also want per-object outlining since we may want to set different colors/effects for each object, and creating an additional layer for each of them is not preferable.
To achieve this, I have copied for shader code for the unity default shader and added an additional pass for the outline shading.
I chose to make a custom shader since it gives a good performance. If you have many different materials that you want to add the outline effect to, you can create an additional mesh and assign it a shader that only handles the outline shading, such a process can be automated.
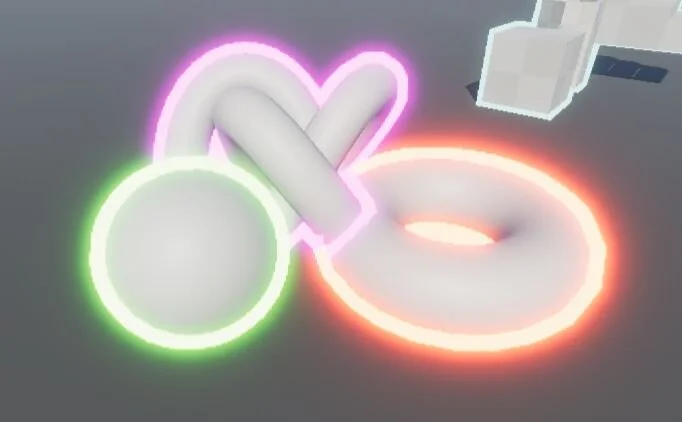
Glow
Making the outline glow is easy. Simply set the color mode of outline color to HDR and turn on bloom in postprocessing.
Outline Overlapping
In addition, you can set the objects to be blocked by different stencil IDs or the same one, which can be helpful when you want them to appear as individual items or items in the same set.

Sharp edge handling
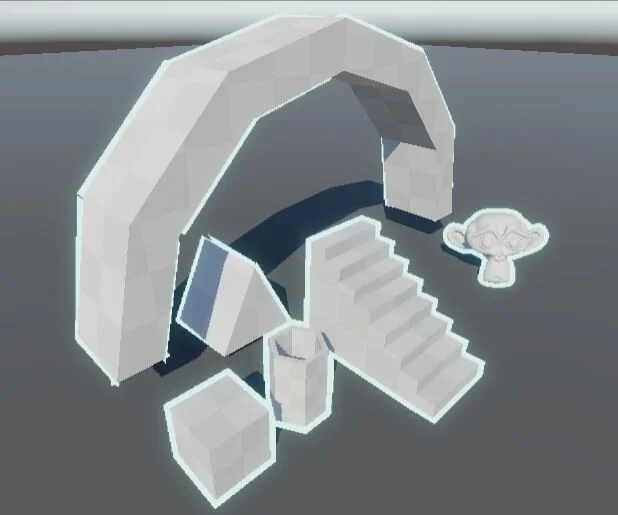
The basic approach of backface culling does work for any sharp edge and will look like the arch and Prism in this picture:
This is because the normal on different faces point to different directions. This can be solved by rounding the model ahead of time or calculating the rounded normals and use them instead of the original ones.
I referenced the normal calculation script from Ned Makes Games to build a tool for creating rounded normals to be used by the outline shader.

Cull Mode
When the stencil buffer is turned on, you can also turn off culling completely to have a more stable outline effect.
Thickness in Screen Space
Referencing the tutorial Pixel-Perfect Outline Shaders for Unity, I was able to create the effect that has a consistent screen space thickness. The idea is to do the vertex extrusion in clip space instead of the world space. This can be helpful depending on the effect you want:

Summary:
This is the most robust method for per-object outlining I’ve tried so far. Works well for almost all kinds of geometry when the stencil is turned on. The parameters are intuitive and easy to change.
However, this method won’t give a good result for inner lines. In addition, having the outline outside of the object can look messy when there are a lot of smaller objects. Managing outline overlapping can be difficult when you have tons of objects in the scene.
Edge Detection by Image Processing:
How it works
Edge detection works by running a convolution filter through each pixel of an image. The filter will return a higher result when there are sudden value changes in the nearby pixel values.
In games, we can first render out the game and then run edge detection on the depth or the normal buffer as a post-processing effect. We will color the image will a solid color(usually black) when the filter returns a value over some threshold.
Since depths and normal textures are not contaminated by lighting or shadow information, it is possible to get very good results.
Basic Implementation
The basic implementation of the effect follows the video series from Ned Makes Games. I simplified parameters where I can. Here’s the result:

Edge detection without normal

Edge detection with normal
Far away object handling
With the basic implementation, the depth filter returns a higher value for faraway objects. It might be caused by the precision loss of depth value because of the encoding method.
I combated this by multiplying the threshold by the eye depth value divided by two. However, this is only a hack and more research needs to be done.
One-Sided Depth outline
The slide Making Concept Art Real for Borderlands proposed a useful technique to only draw outlines that eat in the object. This is done by only checking for depth change for pixels around the current one that have a higher/lower value. This makes the outline effect retain the original object shapes and less messy for scenes with many objects.

Basic implementation, image from Making Concept Art Real for Borderlands

Improved outline, image from Making Concept Art Real for Borderlands
The fact that the outline will only appear inside of the object gives us a lot of possibilities to further improve the final render.
With it, we can choose to only render a layer of objects with the edge detection outline with URP’s custom render feature.
In addition, we can also apply the effect to the whole image then use a stencil buffer to block out the part that we don’t want the outlines.
Handling Resolution Dependency
To make the effect less dependent on the resolution, we can scale the texture to a target resolution before running the filter. The idea is from:
https://github.com/UnityTechnologies/open-project-1/pull/316
Summary:
This method is useful as an image effect and is used by Borderlands(one of my favorite games).
It requires a lot of fine-tuning and the parameters aren’t that intuitive to change in my implementation. However, it can work almost everywhere after you have a result you like.
It works better when thinner outlines and when the objects are not super closed up.
Future Research:
1, Further fine-tune the edge detection method to replicate the look of Borderlands
2, Use additional information from vertex color or texture to control the outline thickness within an object for backface culling outline
3, Implement the contour edge detection outline and stroke stylization
4, Try to replicate some of the effects of Blender Freestyle within Unity and add support for export/import Blender Freestyle to Unity.
Thanks For reading!
You can drop comments in the Github repo if you have any questions